No problem please submit a request to our customer support department at support@jacanawarranty.com and one of our support agents will be in touch with you soon.
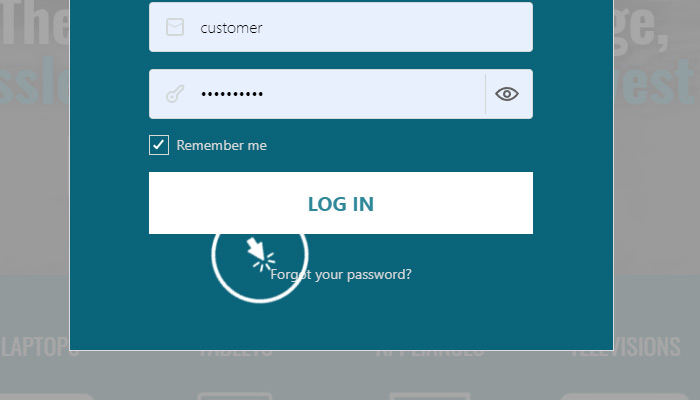
- No problem. You will need to reset your password. In order to do this, simply click the Login Main Menu item on the home page, and click “Forgot Password, and follow the prompts.” If you do not get our Password Reset email, please be sure to check your email client’s junk or spam folder just in case the email was added to those folders by accident.
Please submit a request to our customer support department at support@jacanawarranty.com.
- To Change your contact information, simply click the “Dashboard” main menu item, and you will see a popup, then click “User Profile.”
- There you will see your contact information. Simply edit, and click “Submit.”
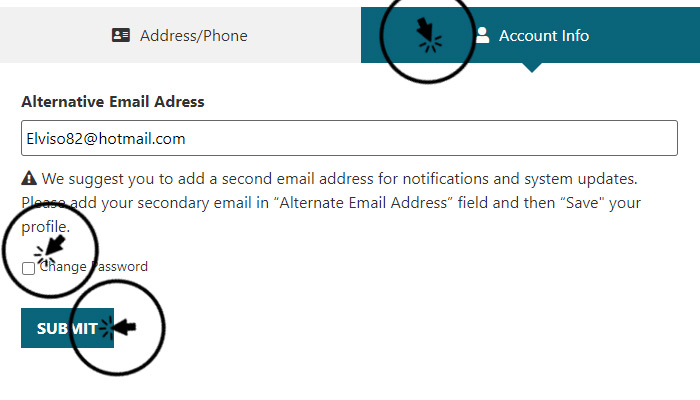
- To change your password, simply click the “Dashboard” main menu item, and you will see a popup, then click “User Profile.”
- Then click the Account Info Tab, and there you will see a checkbox that says, “Change Password.”
- After you have added a new card, and set it to the primary card, you can renew your warranty order 2 ways:
- Go to the Coverage Tab and look for the warranty order you would like to renew under the “Status column, click the card, and then “click renew.”
- Go to the “Orders” Tab, and you will see a column header labeled “Renew,” find the warranty order you would like to renew, and then click the card you would like to use, and then click the “Renew” button under the card dropdown.
- Go to the Coverage Tab and look for the warranty order you would like to renew under the “Status column, click the card, and then “click renew.”
- Monthly Warranty Contracts
- 3,2,1,0 days before Renewal Date
- Annual Warranty Contracts
- 10, 8, 6, 4, 2, 1, 0 days before Renewal Date
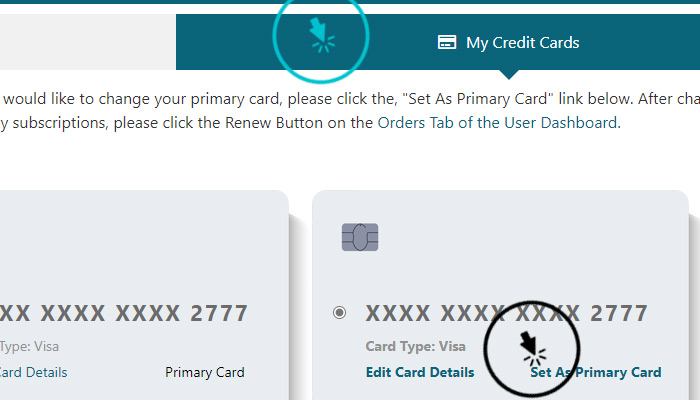
- To make a card the “primary” card on the account, simply click the “Dashboard” menu item, and you will see a popup, then click “Saved Cards.” Once you are on the My Saved Cards page, simply click the “My Credit Cards” tab, and choose the card you would like to make primary by clicking “Set As Primary Card” on the card of your choice.
- If you would like to add/edit/delete any of the cards listed in the dropdown, simply click the “Dashboard” main menu item. You will see a popup appear, and then click “Saved Cards.”
- Add
- On the website's main menu, click the “Dashboard” menu item, and you will see a popup, then click “Saved Cards” or visit My Saved Cards. Here you can add a card. Please note, that after you add your new debit card you must make the card the primary card on the account, in order for your warranty orders to renew successfully. To understand how to make a card the “primary” card, click here.
- Delete
- To delete a card from your card’s list, simply click the “Dashboard” menu item, and you will see a popup, then click “Saved Cards.” Once you are on the My Saved Cards page, simply click the “My Credit Cards” tab, and choose the card you would like to delete by clicking the card itself. Once the card is selected, simply scroll down and click the “Delete Selected Card” button.
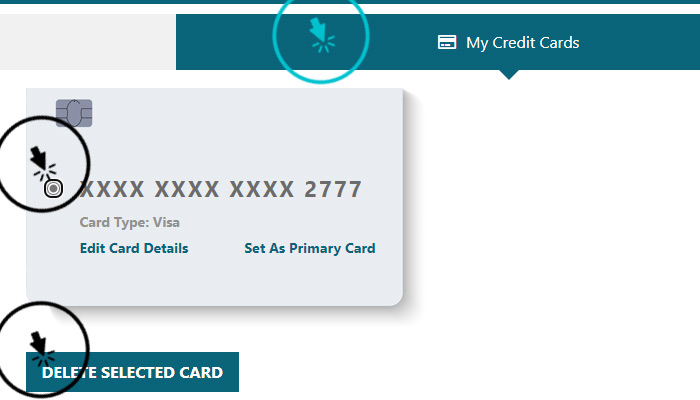
- To delete a card from your card’s list, simply click the “Dashboard” menu item, and you will see a popup, then click “Saved Cards.” Once you are on the My Saved Cards page, simply click the “My Credit Cards” tab, and choose the card you would like to delete by clicking the card itself. Once the card is selected, simply scroll down and click the “Delete Selected Card” button.
- Edit/Modify
- To edit a card from your card’s list, simply click the “Dashboard” menu item, and you will see a popup, then click “Saved Cards.” Once you are on the My Saved Cards page, simply click the “My Credit Cards” tab, and choose the card you would like to edit by clicking the “Edit Card Details” on the card you would like to edit.
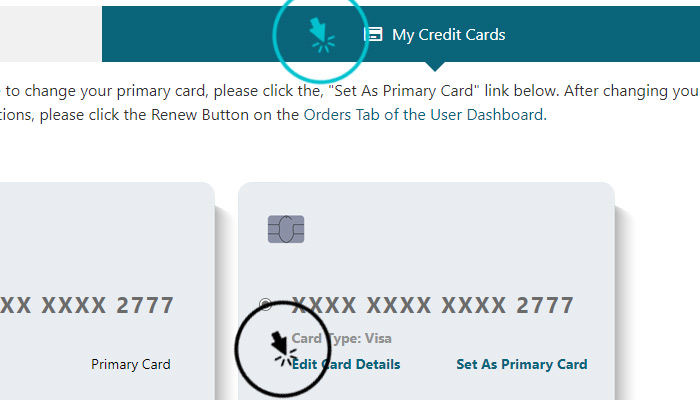
- To edit a card from your card’s list, simply click the “Dashboard” menu item, and you will see a popup, then click “Saved Cards.” Once you are on the My Saved Cards page, simply click the “My Credit Cards” tab, and choose the card you would like to edit by clicking the “Edit Card Details” on the card you would like to edit.
- Add
-
Go to the "Coverage” tab, and you’ll notice a column that says, “Renews.” Here you will see the renewal date of your warranty contract.
- If your warranty is suspended.. You will be given a chance to renew it several ways.
- The first way to renew a “Suspended” Warranty go to the Coverage Tab, and under the “Status Column you will see a dropdown with a Renew button. Simply chose the card you would like to use and click “Renew.”
For cardholder services and balance inquiries, visit www.omnicard.com/cards or call 1-877-357-4975
- Plastic
- When you get your Plastic Visa Gift Card in the mail please follow the activation instructions on the card.
- Virtual Visa Card
- Virtual Visa Gift Cards must be “redeemed.” To redeem a card you’ll see a “View Card” link on the View Card Column, click the View Card link, and follow the prompts.
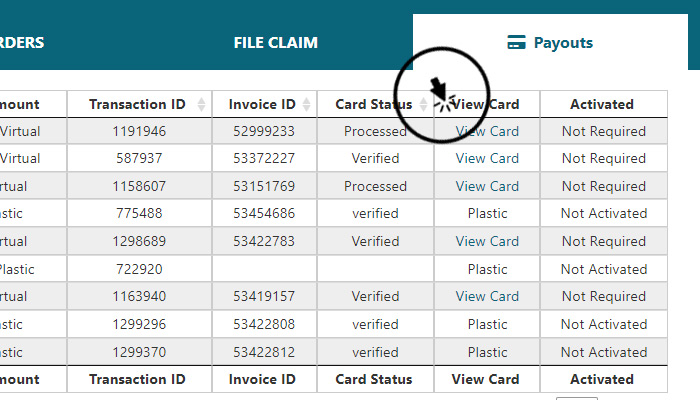
- Virtual Visa Gift Cards must be “redeemed.” To redeem a card you’ll see a “View Card” link on the View Card Column, click the View Card link, and follow the prompts.
- you’ll see a “View Card” link on the View Card Column.

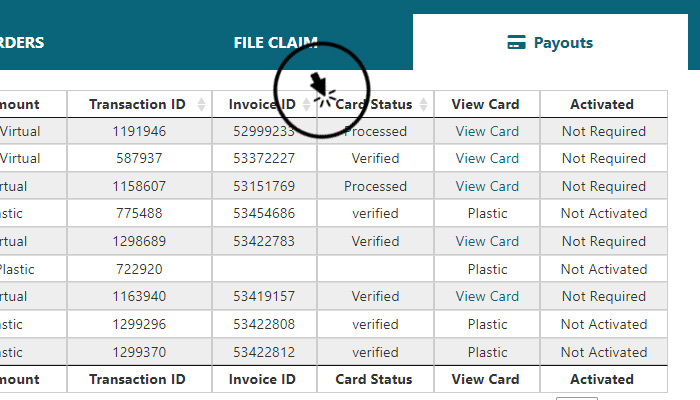
- you’ll see your card status in the card status Column.
BD stands for Breakdown Damage, that is damage that is not due to an accident or due to mishandling.
ADH stands for Accidental Damage from Handling
- To see your payment history click the History Button.
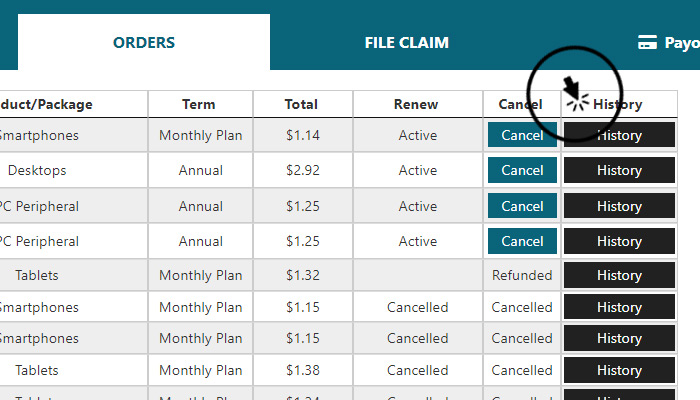
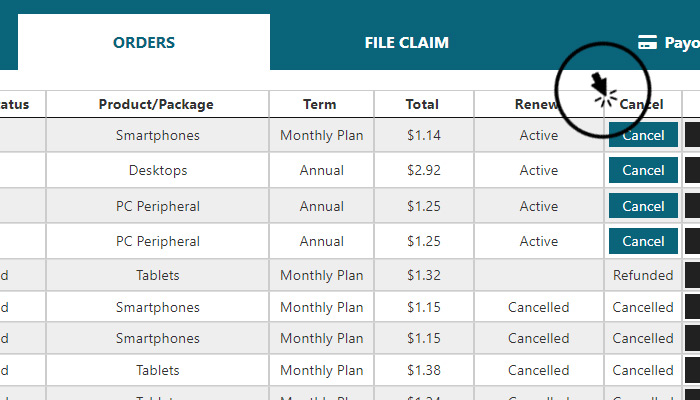
- To cancel your order click the Cancel button. Simply fill out the cancellation request form and it will be sent to our customer support department to process your cancellation request.
After registration, you will be eligible to file a claim, if you meet the eligibility requirements (Read Eligibility Requirements). To file a claim, click here.
-
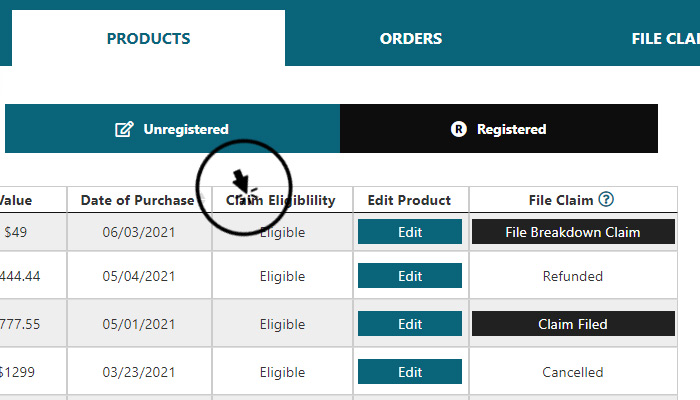
Please note your Claim Eligibility column will indicate if your product is eligible to file a claim. The following are a list of Eligibility Criteria according to your Coverage Contract:
- Eligible
- Your coverage is active AND
- You purchased your product less than or equal to 30 days from today’s date OR you registered your product more than 30 days ago from today.
- Your coverage is active AND
- Not Eligible
- If your coverage is not active. (Suspended, Cancelled, or Expired)
- The date you registered your product is less than or equal to 30 days AND the date you purchased your product is greater than or equal to 30 days from today.
- Your product qualifies for Replacement only, AND the price of your product is less than your deductible.
- If your coverage is not active. (Suspended, Cancelled, or Expired)
- Eligible
-
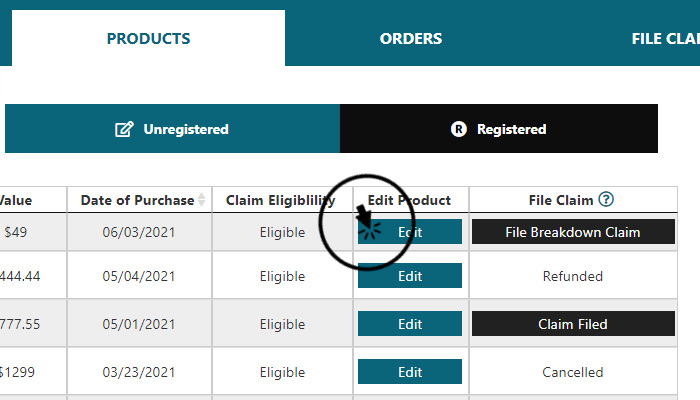
- click on the Products Tab, and then the Registered Products Button, there you will notice that on each product row there is an Edit Button under the Edit Column. It is here you can edit the registration data for your product.
- click on the Products Tab you will see both Unregistered and Registered Products, by clicking the sub-tabs, either “Registered or Unregistered.”
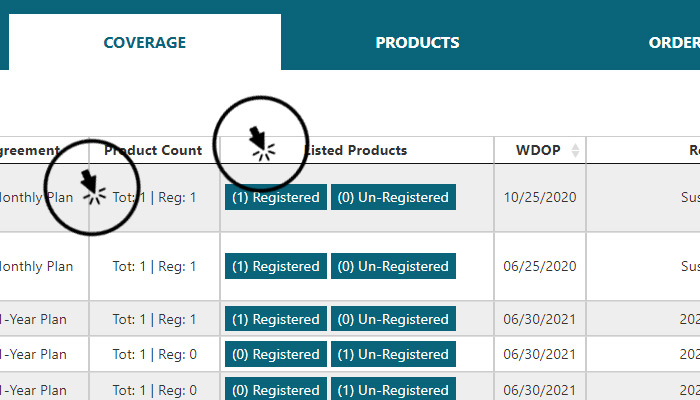
- You can also see how many registered and unregistered products you have by visiting the Coverage Tab of your User Dashboard and looking at both the Product Count column as well as the Listed Products column.

Assuming you have uploaded the receipt for your product after registration and you supplied all the correct information for claim validation while filing your claim, you then will need to upload a picture of your damaged product and a detailed explanation of how the product broke down.
- The first step in filing your claim is registering your product. To register your product, simply visit your User Dashboard and click the Products Tab. Inside of the products tab, there are two buttons, one labeled “Unregistered” and the other, “Registered.” Click the Unregistered button, and listed are all of your products that are not registered. Click the register button next to each product you would like to register.
-
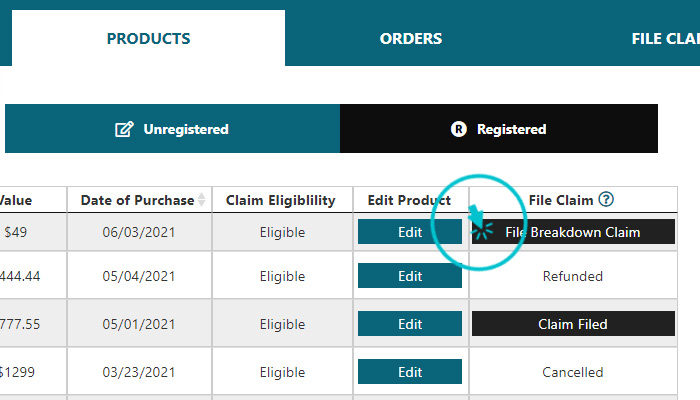
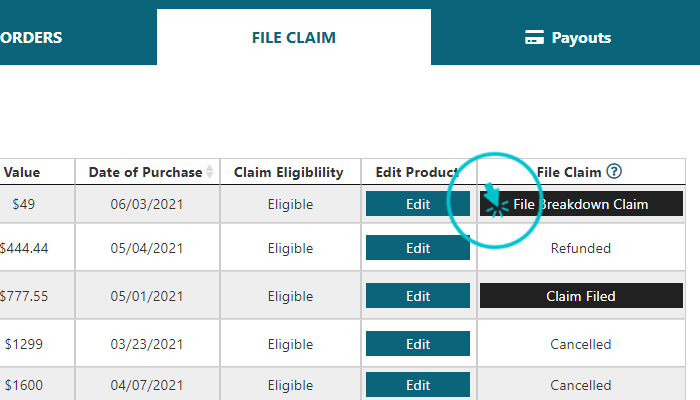
- Next you have to file your claim. There are two ways to quickly file a claim on your product. You can visit your User Dashboard and click the Products Tab, and then the Registered Products Button, OR, you can simply visit the User Dashboard and click the File Claim Tab, here you can Click the File A Claim button that corresponds to your Product. Please note, that you may not be eligible to file a claim on your product if your product doesn’t meet certain criteria. For more information on Claim Criteria, click here.
-
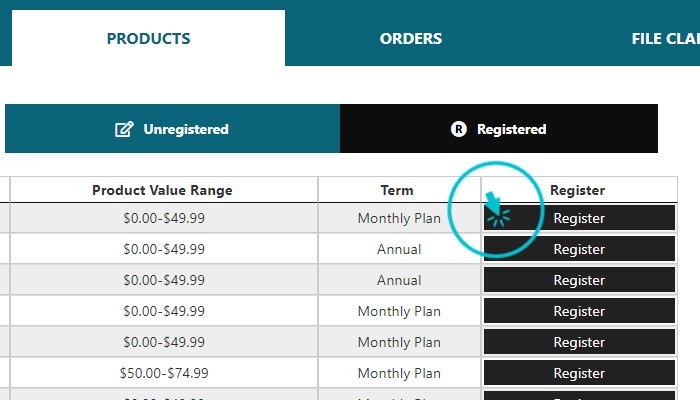
- click the Products Tab. Inside of the products tab, you will notice there are two buttons, one labeled “Unregistered” and the other, “Registered.” Click the Unregistered button, and there you will see all your products that are not registered. Click the register button for the product you would like to register, according to each row.
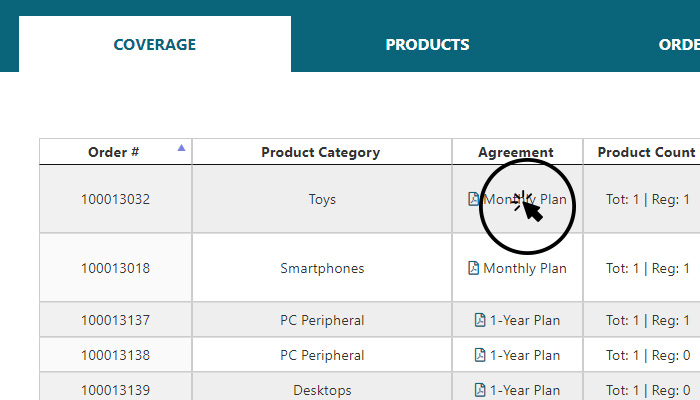
- Your agreement can be found on your User Dashboard. Click the Coverage Tab and on the Coverage Table, look to the column that has the header “Agreement”, there you will find the downloadable agreement in PDF format for each of your coverage plans. This contract is viewable in a browser window, and also printable and downloadable.
